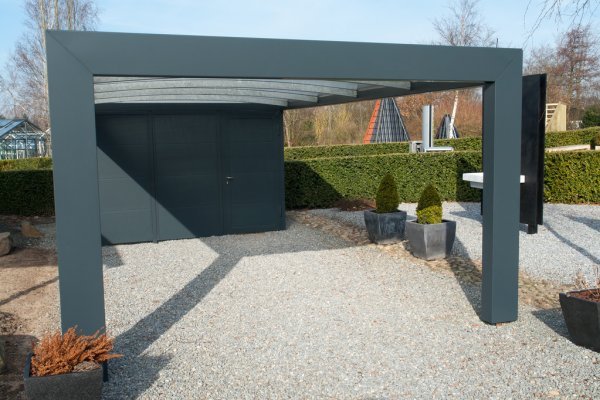
You may want to protect your car but unfortunately, you don’t have a garage or it full. You would consider constructing a carport that can add value to your home and beautify your compound. This is a simple project which is not hard and you can finish easily. You need to do some research and build some basics in DIY works. You also need the right tools for this job, some machines to help you in lifting heavy materials. There are things you need to be keen on implementing your carport.
There are important preliminaries you need to consider. One important thing is to decide where to build your carport. Your utilities determine where you will build your carport. It is good to understand where your electricity water and gas are located. This will help you avoid building and constructing on top of pipes and damage them during the process. Also, find out the legal requirements since a carport is also structure. You should consult with the body controlling the construction. Different countries have different regulations. If you have a lawyer he can help you find the legal procedures.
Have the right tools in place. This is the first step before you start building your carport. If you can’t afford these tools or maintaining these tools you can consider borrowing or hiring them for the period you will be constructing your carport. Some of these basics tools are, hammer drill, shovel, nail gun, measuring tape, rivet gun, hammer, angle grinder, carpenter squire, circular saw, string line, G-clamps, spirit level, adjustable wrench, and a ladder.
Also, keep safety measurements into consideration. List down the hazards that may arise during the work process. Buy some protective gear for safety measures and also don’t forget to include shades, gloves, and ear protection.
From there you need these eleven steps to build your carport whether you are making it from timber or steel.
First, prepare where you want to build your carport by clearing and setting up the perimeters. Follow all the standards and make some good markings using pegs to show clearly your four corners.
Use strings lines to set up the concrete foundation. Stretch the strings such that they replace two pegs and create a rectangular shape. Third, check whether your prototype is a squire.
Fourth dig holes which will hold posts strongly. The soil type determines how depth your holes will be and their dimensions. It is good to have the same depth as your house foundation. Poles made of still needs mounting plates so that they can hold firmly to the ground.
You need also to mix enough cement to help hold the poles firmly on the ground. Take some measurements like coating your metal to avoid rotting. make sure all your poles are on the same level and you can use a spirit level to do so.
If you used standoff or saddle which is u shaped material buried in the ground for helping the poles stand, you need to give the cement sometimes before you put in the poles.
Seventh, Ensure you have a datum line to help you keep your roof in a level. you can use a spirit level to create marks on the four posts. The eighth part is to create attach the beams to the post. This is where you need to use your ladder. Make sure the beams and the posts are strong enough.
The ninth process is to attach the rafters which help to keep the rainwater running off. This will be followed by fitting the downpipe and the gutter for helping water run down. Last but not least lay your desired roof. You are now almost there and the remaining part is your desired decorations. You can now park your car.


